How to Set Up Your Meta Quest 2 for Optimal VR Performance
Have you ever felt overwhelmed by the thought of setting up a new gadget, especially when venturing into the immersive world of virtual reality? If you’re the proud owner of a Meta Quest 2, learning how to set it up properly can make all the difference in your VR experience. From ensuring visual clarity to creating a safe play area, the right configuration not only enhances your enjoyment but also prevents potential mishaps. With a few straightforward steps and practical tips, you can transform your VR sessions from ordinary to extraordinary. Let’s explore this step-by-step guide to setting up your Meta Quest 2 for an unforgettable journey into virtual worlds.
Key Considerations
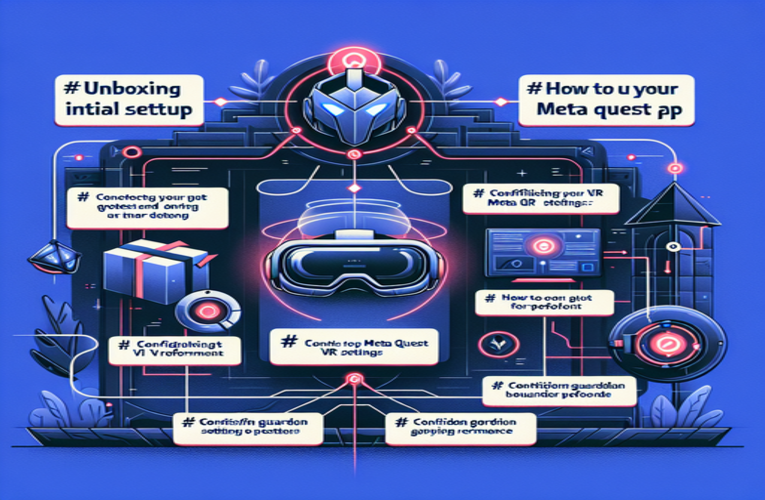
- Unboxing and organizing your Meta Quest 2 components
- Fully charging your VR headset before first use
- Adjusting fit and lens alignment for maximum comfort
- Preparing a safe and spacious play area for VR exploration
- Connecting to Wi-Fi and setting up your Meta account
- Completing the interactive tutorial to familiarize yourself with controls
- Optimizing display and performance settings for smoother visuals
- Utilizing the Guardian system to set up safe boundaries
Now that you have an overview, let’s delve deeper into each of these aspects to make the most of your Meta Quest 2 setup.
Setting Up Your Meta Quest 2: A Comprehensive Guide
Embarking on a virtual reality journey with the Meta Quest 2 opens up a world of immersive experiences. Proper setup is essential to ensure you get the most out of your device. This guide provides detailed instructions on how to set up your Meta Quest 2 for the first time, allowing you to dive into VR with confidence.
Unboxing Your Meta Quest 2
Carefully unbox your headset, controllers, charging cable, and any included accessories. Verify that all components are present and in good condition. Place them on a clean, flat surface to keep everything organized during the setup process.
Powering Up the Device
Before using your Meta Quest 2, it’s recommended to fully charge it. Connect the charging cable to the headset’s USB-C port and plug it into a power source. Charging to 100% takes approximately 2.5 hours. Once charged, turn on the device by holding the power button on the side until the display lights up. If the headset doesn’t power on, check the charging indicator to ensure the battery is sufficiently charged.
Adjusting Fit and Lens Alignment
For optimal comfort and visual clarity, adjust the head strap so the headset sits snugly but comfortably on your head. Fine-tune the lens spacing using the sliding mechanism beneath the lenses to match your interpupillary distance (IPD). The Meta Quest 2 offers three IPD settings: 58mm, 63mm, and 68mm. Proper lens alignment enhances image clarity and reduces eye strain.
Preparing Your Play Area
Ensure that you have a safe, open space to use your Meta Quest 2. Clear an area of at least 2 meters by 2 meters of any obstacles such as furniture, pets, or decor. Adequate space prevents accidental collisions and enhances tracking accuracy. The Guardian feature allows you to set virtual boundaries, alerting you when you approach the edge of your play area.
Connecting to Wi-Fi and Setting Up Your Account
With the headset on, follow the on-screen prompts to select your language and connect to your Wi-Fi network. Enter your network password using the virtual keyboard. You’ll be prompted to log in or create a new Meta account. A Meta account is necessary to access the Oculus Store and download apps. Remember to use a strong password to protect your personal information and purchases.
Completing the Tutorial
After the initial setup, you’ll be guided through an interactive tutorial. This tutorial covers basic navigation, using the controllers, and interacting with virtual environments. Completing it will familiarize you with essential functions and enhance your overall experience.
Congratulations! Your Meta Quest 2 is now set up and ready to use. With proper configuration, you can fully immerse yourself in virtual reality, exploring games, educational content, and social experiences. Take the time to adjust settings to your preferences, ensuring comfort and enjoyment during your VR adventures.
Connecting Your Meta Quest 2 to the Meta Quest App: Step-by-Step Guide
Linking your Meta Quest 2 headset to the Meta Quest mobile app unlocks additional features and enhances your VR experience. The app allows you to manage your device, browse and purchase content, and connect with friends. Follow these steps to connect your headset to the app:
- Download and Install the Meta Quest App
Visit the Google Play Store or Apple App Store on your smartphone. Search for “Meta Quest” and download the official app developed by Meta Platforms, Inc. Ensure your smartphone meets the app’s system requirements for optimal performance. - Create or Sign In to Your Meta Account
Open the app and sign in with your Meta account credentials. If you don’t have an account, select the option to create one. Completing your profile allows you to access personalized content and social features. - Power On Your Headset
Turn on your Meta Quest 2 by holding the power button until the indicator light illuminates. The headset should be near your smartphone to facilitate a smooth connection. - Enable Bluetooth and Grant Permissions
On your smartphone, ensure that Bluetooth is enabled. The app may request permissions for Bluetooth and local network access. Grant these permissions to allow the app to detect and connect with your headset. - Pair the Headset with the App
In the Meta Quest app, tap on the menu icon and select “Devices” followed by “Pair New Headset.” Follow the on-screen instructions, which may include entering a pairing code displayed in your headset. If the devices do not connect, confirm both are on the same Wi-Fi network and restart the pairing process.
Once paired, the app provides easy access to the Oculus Store, settings customization, and social integrations. You can remotely install games to your headset, adjust comfort settings, and stay updated with the latest VR news and updates. Regularly checking the app ensures your device remains up-to-date with the newest features and improvements.
Optimizing Your Meta Quest 2 for Enhanced VR Performance
To fully experience the capabilities of your Meta Quest 2, optimizing settings for performance and comfort is essential. Whether you’re seeking sharper graphics or smoother gameplay, the following adjustments can significantly improve your VR sessions:
Adjusting Display and Performance Settings
Access the “Experimental Features” section in your headset’s settings menu to modify advanced options. Increasing the refresh rate to 90Hz can make visuals appear smoother, which is particularly beneficial in fast-paced games. Adjusting the render resolution can enhance image clarity. Higher settings provide better visuals but may affect performance, so find a balance that suits your preferences.
Tweaking In-Game Settings
Individual games often offer settings to optimize performance. For graphics-intensive games like The Walking Dead: Saints & Sinners, lowering the graphics quality or disabling unnecessary visual effects can improve frame rates by up to 30%. Check each game’s settings menu for options and adjust accordingly to enhance smoothness without significantly compromising visual fidelity.
Optimizing Your Play Environment
Improving your physical play space can enhance tracking accuracy and overall experience. Ensure the area is well-lit but avoid direct sunlight, which can interfere with the headset’s sensors. Remove any objects that could obstruct movement or cause reflections. According to Meta’s safety guidelines, a consistent environment aids the headset in maintaining optimal tracking performance.
Enhancing Comfort for Longer Play Sessions
Comfort modifications can make extended VR sessions more enjoyable. Consider accessories like the Elite Strap for better weight distribution or adding a VR cover for improved hygiene and comfort. Taking regular breaks, as recommended by eye health professionals, helps reduce eye strain and fatigue, allowing for longer and more comfortable playtime.
By fine-tuning these settings and adjusting your environment, you can significantly enhance your Meta Quest 2 experience. These optimizations contribute to smoother gameplay, better visuals, and increased overall enjoyment, allowing you to immerse yourself fully in virtual reality.
Setting Up Guardian Boundaries for Safe Virtual Reality Experiences
The Meta Quest 2’s Guardian system is a crucial safety feature that helps prevent accidents by defining a virtual play area. Properly setting up the Guardian boundaries ensures you stay within a safe space while immersed in VR. Follow these steps to configure the Guardian system effectively:
Starting the Guardian Setup Process
With the headset on, open the settings menu and select “Guardian.” Choose “Set Up Guardian” to begin. You’ll be prompted to select between “Stationary” and “Roomscale” setups. Select “Roomscale” for experiences that involve movement around your space.
Defining Your Play Area
The headset will guide you through mapping your play space. Point your controller at the floor and trace around the perimeter of your available area. Ensure the space is clear of obstacles and hazards. Meta recommends a minimum area of 2 meters by 2 meters for roomscale VR experiences, but a larger space provides greater freedom of movement.
Enhancing Guardian Accuracy
- Ensure Consistent Lighting: Adequate lighting improves tracking accuracy. Avoid playing in very dark or extremely bright environments.
- Regularly Update Your Boundaries: If your play area changes, update the Guardian settings to reflect the new space.
- Test the Boundaries: Before engaging in active gameplay, move around to test if the virtual grid appears correctly when nearing the edges.
- Stay Alert: The Guardian system is an aid but not a substitute for awareness. Remain mindful of your surroundings to prevent accidents.
By properly configuring the Guardian system, you create a safer environment that allows you to enjoy VR content without worrying about physical obstacles. According to user safety reports, incidents decrease significantly when the Guardian boundaries are accurately set up and utilized.
Taking the time to set up and calibrate your Guardian boundaries enhances both safety and immersion. With the Guardian system in place, you can focus on exploring virtual worlds, knowing that the system will alert you if you’re nearing the limits of your safe play area.
Summary
Setting up your Meta Quest 2 correctly can vastly improve your overall VR experience, allowing for enhanced visuals and safety during gameplay. By following essential configuration steps, such as optimizing display settings for the Meta Quest 2 and defining Guardian boundaries, you ensure a comfortable and exhilarating journey into virtual reality. Additionally, calibrating your Meta Quest 2 for accurate tracking and customizing controller settings can further enhance your immersive experience. Ultimately, these adjustments not only elevate your enjoyment but also help you avoid mishaps, transforming your VR sessions into unforgettable adventures with the Meta Quest 2.
Questions and Answers
How can I enhance the comfort of my Meta Quest 2 VR headset during extended virtual reality gaming sessions?
Consider investing in high-quality accessories such as the Elite Strap for improved weight distribution and balance, and adding a VR hygiene cover to maintain cleanliness. Additionally, taking regular breaks is crucial to minimize eye strain and reduce fatigue, thereby boosting your overall comfort during prolonged use of the Meta Quest 2 headset.
What are some effective methods to optimize my virtual reality play environment for the Meta Quest 2 headset?
Ensure your VR play area is well-lit without direct sunlight, as excessive lighting can interfere with the headset’s tracking sensors. Clear the space of any obstructions or hazards to provide ample room for movement, and maintain a consistent environment to help the Meta Quest 2 accurately track your gestures and movements, thereby enhancing overall performance and immersion in virtual reality experiences.
Is it feasible to use my Meta Quest 2 virtual reality headset in a smaller play area than the recommended size?
While it is possible to operate the Meta Quest 2 VR headset in a smaller space, the manufacturer recommends a minimum play area of 2 meters by 2 meters to ensure optimal safety and accurate tracking of your movements. A larger virtual reality play space is preferable for a more immersive gaming experience and to minimize the risk of accidents or collisions while using the headset.
In what ways do adjustments to the refresh rate and render resolution influence the Meta Quest 2 VR headset’s performance?
Increasing the refresh rate can deliver smoother and more fluid visuals, especially in fast-paced virtual reality games, while modifying the render resolution can enhance the sharpness and clarity of images displayed through the headset. However, higher settings may place additional demands on the hardware and potentially impact overall performance, so it is important to find a suitable balance between visual quality and system performance to ensure an enjoyable and seamless VR experience.
What steps should I take if my Meta Quest 2 VR headset is not connecting to the Meta Quest mobile app?
First, verify that your smartphone’s Bluetooth is enabled and that both the Meta Quest 2 headset and the mobile device are connected to the same Wi-Fi network. If the connectivity issue persists, try restarting both the VR headset and the Meta Quest app on your smartphone. These troubleshooting steps can often resolve pairing and connection problems, ensuring a successful link between your headset and the app for optimal virtual reality performance.


