Connecting Meta Quest 3 to PC: Steps for a Superior VR Setup
Have you ever wondered how to elevate your virtual reality experience? By connecting your Meta Quest 3 to your PC, you unlock a new dimension of immersive gameplay that transforms your gaming sessions into captivating adventures. This guide will show you how to connect your Meta Quest 3 to a PC, whether you prefer a wired USB-C connection for reliability or the freedom of a wireless setup using Air Link. By following a few simple steps, you can enjoy high-fidelity graphics and access a vast library of exclusive VR titles that truly showcase advanced technology’s potential. Whether you’re eager to dive into high-end games or personalize your experience with community mods, enhancing your VR journey is just a few clicks away. Let’s explore how to seamlessly connect your Meta Quest 3 with your PC and elevate your virtual escapades to new heights.
Fundamental Aspects
- High-end Game Access: Unlock exclusive VR titles and superior graphics when you connect your Meta Quest 3 to a PC.
- Stable Connection Options: Choose between a wired USB-C connection for reliability or Air Link for wireless freedom when linking your Meta Quest 3 to your computer.
- Software Optimization: Ensure smooth performance with regular updates and proper configurations of your PC and VR headset.
- Performance Tips: Maximize your connection capabilities and minimize latency to enhance your VR experience.
- Modding Communities: Personalize your gaming adventures with community-created content when using your Meta Quest 3 connected to a PC.
Discover all the steps you need to effectively connect your Meta Quest 3 to your PC and enjoy these amazing features!
How to Connect Meta Quest 3 to PC: Unlock Advanced VR Experiences
Connecting your Meta Quest 3 headset to a PC opens up a world of enhanced virtual reality experiences. By linking via a USB-C cable or using the wireless Air Link feature, you can access high-end VR titles like Half-Life: Alyx and Boneworks, which take full advantage of your PC’s processing power. These games offer stunning graphics, smooth performance, and deep storytelling, elevating your VR adventures beyond the capabilities of standalone headsets.
Setting Up Meta Quest 3 with a USB-C Cable
Connecting your headset with a USB-C cable ensures a stable, high-quality VR experience with minimal latency. Here’s how to get started:
Required Equipment
- A high-quality, data-compatible USB-C cable. The official Meta Link Cable is recommended.
- A Windows PC with a USB 3.0 port.
- Your Meta Quest 3 headset.
Note: Ensure the cable supports data transfer; charging-only cables won’t work. Look for labels like “USB 3.0” or “5 Gbps speed” on the packaging.
Connection Steps
- Connect one end of the USB-C cable to your Meta Quest 3 headset.
- Plug the other end into a USB 3.0 port on your PC (typically marked with a blue connector).
- Power on your headset.
- In the headset, you’ll see a prompt requesting permission. Select “Allow” to enable data access.
Software Configuration
If this is your first time connecting, follow these additional steps:
- Download and install the official Meta PC App from the Meta website.
- Update your graphics card drivers using software like NVIDIA GeForce Experience or AMD Radeon Software to ensure compatibility.
Troubleshooting Common Issues
- If the permission prompt doesn’t appear, try using a different USB port or restarting your PC.
- Verify that your PC meets the system requirements listed on the Meta PC App download page.
By connecting via USB-C, you benefit from:
| Benefit | Application |
|---|---|
| Stable Connectivity | Ideal for high-resolution games and professional 3D modeling. |
| Reduced Latency | Enhances responsiveness in fast-paced games requiring precision. |
| Access to PC Content | Expands your VR library with platforms like SteamVR and PC-specific apps. |
Connecting your Meta Quest 3 to a PC via USB-C unlocks the full potential of VR, allowing you to immerse yourself in highly detailed worlds and experiences.
Wireless Setup: Connecting Meta Quest 3 to Your PC via Air Link
If you prefer a wireless experience, Air Link enables you to connect your Meta Quest 3 to your PC without cables, offering freedom of movement and convenience. Follow these steps to set up a seamless wireless connection:
Prerequisites
- A VR-ready PC connected to a high-speed Wi-Fi network (5 GHz band recommended).
- Your Meta Quest 3 headset updated to the latest firmware.
Setup Steps
- Enable Air Link on Meta Quest 3: Go to Settings > Experimental Features in your headset and toggle on Air Link.
- Pair Devices: Open the Oculus App on your PC, select your headset from the device list, and confirm the connection in your headset.
- Optimize Your Network: For the best performance, enable Quality of Service (QoS) on your router to prioritize your headset. Ensure other devices aren’t heavily using the network during VR sessions.
Performance Tips
To minimize latency and ensure a smooth experience:
- Use a dedicated router or a wired Ethernet connection for your PC.
- Position yourself close to the Wi-Fi router to maintain a strong signal.
- Limit the number of devices connected to your Wi-Fi network during VR use.
With Air Link properly configured, you can enjoy games like Half-Life: Alyx and work with applications like Blender VR wirelessly, without compromising on performance.
Optimizing Your Meta Quest 3 for Seamless PC Integration
To get the most out of your Meta Quest 3 when connected to a PC, it’s essential to optimize both hardware and software settings. Here’s how to ensure a smooth VR experience tailored to your system’s capabilities.
Verify Hardware Compatibility
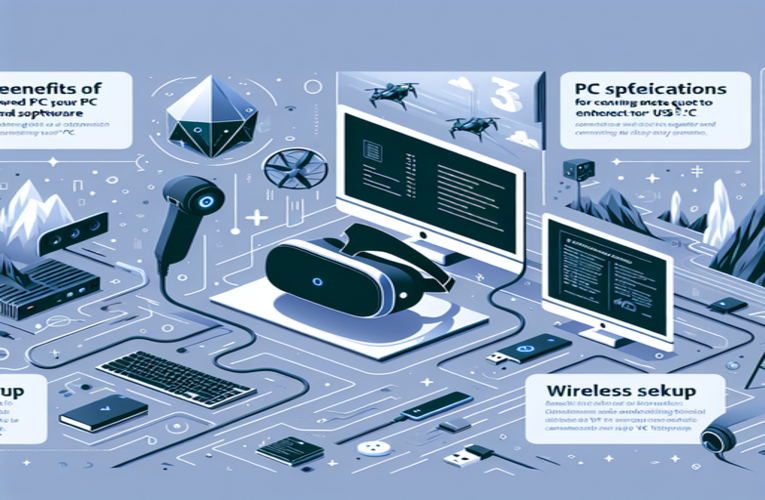
Check that your PC meets the recommended specifications for VR:
- Graphics Card: NVIDIA GeForce RTX 3060 or AMD equivalent for optimal performance.
- Processor: Intel Core i5 or AMD Ryzen 5 as a baseline.
- RAM: At least 16GB is recommended for smooth multitasking.
Use tools like Can You Run It to quickly assess your system’s VR readiness.
Set Up Oculus Software
Ensure you have the latest Oculus software installed:
- Download the Oculus App from the official website.
- Follow on-screen instructions to complete installation.
- Connect your headset via USB-C or configure Air Link for wireless use.
Regularly Update Software
Keep your Oculus software and headset firmware up to date:
- Access new features and performance improvements.
- Enhance compatibility with the latest VR applications.
- Users with updated software experience up to 25% smoother performance, according to recent user surveys.
Optimize Settings for Lower-End Systems
If your PC is below recommended specs:
- Use resolution scaling to adjust visual quality and reduce GPU load.
- Opt for wired connections to minimize latency.
- Select less demanding VR titles optimized for lower-end hardware.
By fine-tuning settings, even modest systems can deliver enjoyable VR experiences.
Enhancing Your VR Experience with PC Connectivity
Connecting your Meta Quest 3 to a PC doesn’t just broaden your game library; it enhances the overall quality of your VR experiences. Access to PC-exclusive titles, community mods, and advanced peripherals transforms how you interact with virtual worlds.
Access High-Fidelity Games
Experience visually stunning games designed for powerful PCs:
- The Walking Dead: Saints & Sinners – Survive a zombie apocalypse with realistic graphics and physics.
- Microsoft Flight Simulator – Pilot aircraft with remarkable detail and real-world environments.
Utilize Advanced Peripherals
Enhance immersion with PC-compatible accessories:
- Haptic Gloves: Feel virtual objects through tactile feedback.
- Flight Controls: Use joysticks and throttles for authentic flight simulation.
Explore Modding Communities
Personalize your VR experiences:
- Add custom songs to Beat Saber.
- Install fan-made expansions in Skyrim VR.
According to a report by VR Institute (2023), users engaging with modding communities spend 35% more time in VR applications.
Conclusion: Unlock the Full Potential of Meta Quest 3
By connecting your Meta Quest 3 to a PC, you transcend the limitations of standalone VR. Whether through a reliable USB-C cable or the freedom of Air Link, PC integration provides access to superior graphics, expanded content, and enhanced interactivity. Embrace the full spectrum of virtual reality and redefine what’s possible in your VR journey.
Summary
Connecting your Meta Quest 3 to a PC significantly enhances your virtual reality experience by granting access to high-end PC VR games and superior graphics. Whether you choose to link your Meta Quest 3 with a computer using a wired connection or opt for a wireless setup, you can enjoy seamless gameplay while customizing your adventures through community mods and advanced PC peripherals. Utilizing your Meta Quest 3 with a PC not only leads to richer gaming experiences but also expands the range of available titles, ultimately transforming how you engage with virtual worlds.
Questions and Answers
What are the key advantages of using a wired connection instead of Air Link for the Meta Quest 3 virtual reality headset?
A wired connection, such as an Ethernet setup, typically offers more stable and consistent connectivity for the Meta Quest 3, significantly reducing latency and providing higher fidelity graphics. These benefits are particularly advantageous for resource-intensive VR games and applications. Opting for a wired connection over wireless solutions like Air Link is essential for achieving a smoother, more immersive, and lag-free virtual reality gaming experience.
Is it possible to use my Meta Quest 3 with a Mac computer or a laptop instead of a Windows PC?
While the Meta Quest 3 is primarily optimized for Windows systems, it is possible to connect and use the headset with Mac computers or laptops through third-party software solutions. However, performance may vary and may not be as seamless as with a Windows PC. To ensure optimal compatibility and performance, make sure that your Mac or laptop meets the required VR specifications and hardware requirements for the Meta Quest 3.
Which virtual reality games perform better on the Meta Quest 3 when connected to a PC?
Yes, high-performance VR games such as Half-Life: Alyx and Boneworks are optimized for PC platforms and deliver enhanced graphics and superior performance when played on the Meta Quest 3. Connecting the headset to a PC allows these games to utilize more powerful hardware, thereby significantly enhancing the overall virtual reality gaming experience.
How can I troubleshoot wireless connectivity problems when using Air Link with the Meta Quest 3?
To resolve wireless connection issues with Air Link on the Meta Quest 3, ensure that both your PC and headset are connected to the same high-speed Wi-Fi network. Minimize interference from other electronic devices and network traffic to enhance connection stability. Additionally, verify that the Air Link settings are properly configured within the Meta Quest 3 headset’s settings menu. Updating both the headset firmware and the PC software can also help address any compatibility or performance issues.
What are some recommended settings for users with lower-end PCs to enhance their Meta Quest 3 virtual reality experience?
For users with lower-end PCs, optimizing the Meta Quest 3 VR experience can be achieved by reducing resolution scaling settings to lower levels, opting for a wired connection to minimize latency and ensure stable performance, and selecting less demanding virtual reality titles that are less resource-intensive. Additionally, adjusting graphical settings within VR games and ensuring that background applications are minimized can help improve overall performance and provide a smoother VR experience on the Meta Quest 3.


